Watt's Up Musings of an original geek

October 22, 2007

Friends in town 4

Filed under: Uncategorized — admin @ 3:25 am

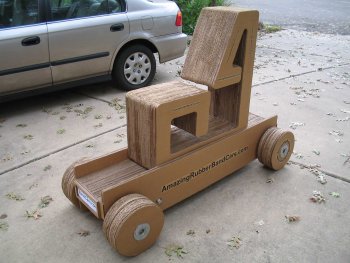
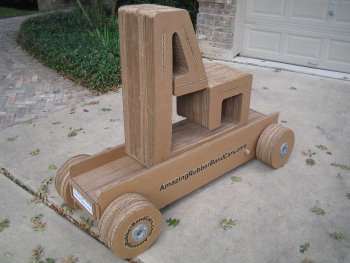
The second day at the Maker Faire was much like the first. However, I had a 10K road race to run. So Mike, Annelle and Kathy went on ahead. I arrived at about 10 AM a bit stiff, but happy to have run a good race. Again we had our same “jobs”. The adults and kids loved riding the big car. While riding each would have a big smile on their faces and most would do the “beauty queen” wave – elbow, elbow, wrist, wrist, wrist. After their ride Kathy would give each one a “www.amazingrubberbandcars.com” rubberband wrist band. We did have three big car rubberband failures – sudden snap. But then we had more space and we were making longer and longer runs – tightening the bands more. In about 5 minutes each broken band was removed and a new band was installed. The Faire ended at 5 PM, and we packed up Annelle and Mike and they headed off on their trip home. Wow, what a weekend! We got home and crashed, double crashed – what we learned is that we’re no longer spring chickens. But we had so much fun. Now we need a weekend from our weekend.
Update: Me making small rubber band cars with my sweetheart

Friends in town 3

Filed under: Uncategorized — admin @ 2:57 am

We’re Makers! We have Maker Faire badges – woohoo!. Mike made up gray T-shirts for both Kathy and I with the cover of his book on them. He and Annelle had blue knits shirt with the cover too. We left home at 8:30, got to the Faire at 9 AM, did some last minute setting up and the Faire started at 10 AM. We were in the children’s area. Lots of family oriented things were located there. Annelle and Kathy were a great team. Annelle would push the big car back, explain how it worked and Kathy was at the other end as the big car catcher. After the ride Annelle would gently direct them to Mike who would tell them about the book. Very smooth. I was a “maker” sitting on the edge of the booth cutting cardboard, gluing it and making small runner band cars to give out. We did that from 10 AM to 6 PM. Amazing how tiring doing this is. If that wasn’t enough… After the Faire closed for the night we quickly closed up and headed to town to see the Newsboys. We got the tickets through Annelle and Mike’s daughter. We were right down front. Great seats, and a great time. We got home and crashed – we were exhausted.
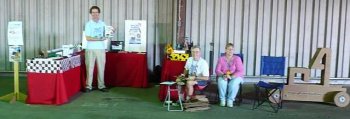
Update: Our display just before the crowds arrived


Update: Newsboy Concert showing the drummer on his vertical spinning stand – awesome!

Friends in town 2

Filed under: Uncategorized — admin @ 2:12 am

We arrived at the Austin Maker Faire at the Travis County Exposition Center at about 9 AM for setup. Within about 1 1/2 hours we had put together three tables, and decorated them. We positioned the big car out front.

We came back home for lunch. On the way back home from Maker Faire I phoned SegCity and made a reservation for a tour of Austin on Segway HTs. At 2:30 we arrived at SegCity, met the 6 other people taking the tour, and our guide, Alexa. We saw a safety video, took a short course on the unit (balancing, turning in place, and negotiating a figure eight around two cones) then we were off on the tour – whee!. For the next 2 or more hours we toured downtown Austin including the City Hall, and the Texas Capital.
By the end we were exhausted especially Kathy who had a small spill on the Segway. [Also maybe we should have remembered that for the next two days we’d be on our feet about 8 hours each day – oops] But tired legs didn’t stop us from enjoying BBQ at Rudy’s

October 19, 2007

Friends in town 1

Filed under: Uncategorized — admin @ 2:00 am

Our friends, Annelle and Mike, arrived this evening. They drove in from Florida, and they are staying with us for the weekend. It is nice to see them again and we’ve got a busy weekend ahead – every minute is filled. The last time we were together was three years ago, and that time we visited them at their home. More to follow…

October 11, 2007

Large Amazing Rubberband Car video now on YouTube.com

Filed under: Uncategorized — admin @ 11:21 am

See the large Amazing Rubberband Car video now on YouTube.com.

Coming to Maker Faire Austin

Filed under: Uncategorized — admin @ 11:04 am

The video has been linked to from boing boing!!? here, here, and here. That’s so cool!

and also my son’s weblog: here

Thanks Justin for the links.

October 8, 2007

Car Construction 6

Filed under: Uncategorized — admin @ 4:04 am

October 7: WOOHOO! The band clamp and wheels work.

Play video
Engineering Change 3: I had a thought, but I’m not going to pursue it. It would be nice to add in a simple one-way ratchet clutch mechanism so that when the car is rolled in reverse it tightens the rubber bands, but when it goes forward it does not. This would stop the roll back as shown in the video. However that would mean we’d need brakes whereas now it’s got automatic rubber band breaking.
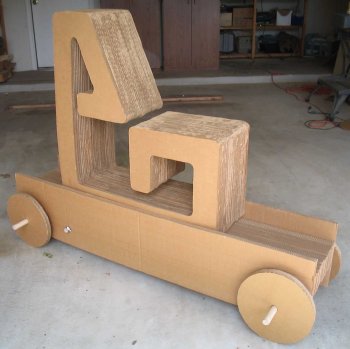
Next I completed the signage the car, chair and rear wheels. I used brown paper to match with the overall color scheme. I put it through my printer without incident. Also I added flat “bumpers” to the front and rear to finish the ends. On the bumpers I added paper license plate holder and license plate.
OK, I think it’s ready to go. That is, it’s all done. Click on picture to see larger image.

Update: Engineering Change 4: (wraparound drum) To provide more thrust the rubberbands should wrap around a 3″ to 4″ diameter drum instead of around the 1″ axle. Then the drum should be attached to the axle [how to do this is left as an exercise for the “student”]. Using a drum might also make Engineering Change 3 (one-way ratchet mechanism) easier to do.
Engineering Change 5: (seat pins) Since the seat is removal sometimes when pushing the seat to move the car back to wind it up the seat begins to rock backwards. So the car sides should have a way to pin the seat into the sides – maybe just two nails or a 1/4″ dowel.

Car Construction 5

Filed under: Uncategorized — admin @ 3:56 am

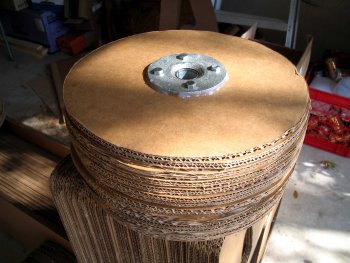
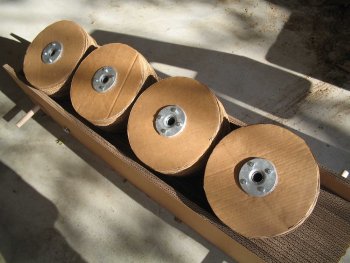
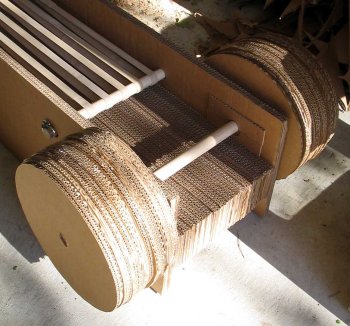
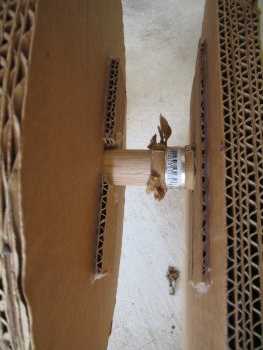
October 6: I’ve been building the wheel mounts. I’ve been puzzling about what to do all week. I went over to Home Depot to look around. I was considering (1) using a pipe flange, and (2) using a thick cardboard tube or sleeve. After talking to a great plumbing sales person there I got four 1″x6″ pipes (he called them nipples) and four 1″ flanges. When I got home I inserted a pipe/flange combo into each wheel. Then slide the pipe over the oak dowel and I’ve drilled hole in the non-flange end to bolt to the oak axle. I’ll tell you more tomorrow once I’ve attached them to the axles.

Car Construction 4

Filed under: Uncategorized — admin @ 3:51 am

September 30: Engineering problem 1 (band slippage) I think is solved. I added a curved metal strip across all the bands.

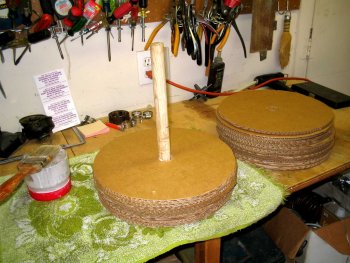
I’m in the process of solving engineering problem 2 (wheel fragility and mount) – I’m making slicks for the tires. I spent a few hours today cutting out more wheel discs and gluing them. I think I actually made the slicks too thick, but I can always cut them down making them thinner. I still have yet so solve how I’m going to attach them to the axles, but I think this is a start in the right direction.
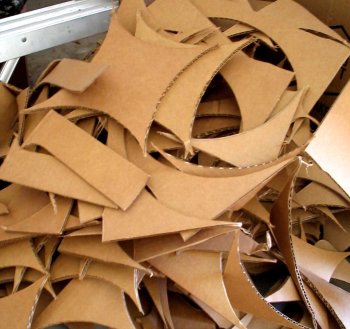
BTW, I had to get another gallon of Elmers glue. Also I’ve just about burned through all my cardboard making the wheel discs. Now I have a nice big pile of scrap.

Car Construction 3

Filed under: Uncategorized — admin @ 3:34 am

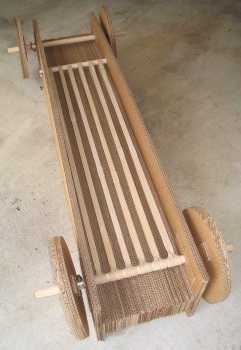
September 29: I completed the car’s final assembly. The results of which are: Car serial number #2 rolled off the assembly line.

To accomplish this I sanded down the chair back and seat with a rough circular disk to make it more comfortable.
Second, I had to sand down my 1″ dowels so that they would fit into the 1″ inside diameter bearing. That took a while since they were oak. Next I mounted the front dowel, bearing with filler ring, bearing mounts, and rubber bands onto the chassis. I did this vertically so the bands hung down. Then I cut the “rubber band brace” down shorter so that it extended only 1/2″ beyond the width of the body. Next I looped all of the bands around the runner band brace. Finally I tightened pipe clamps to each end of the runner band brace.
I want to allow the wheels to be removed (possibly for transport or to access/remove the bearing or rubber bands) so I added two double-thickness cardboard tabbed flange pieces to each wheel. I used hot-melt gun to attached these tabs to the wheel. Then I used a pipe clamp to attached the tabbed wheel to the axle.
So the car is done, and I tried it out… At this time I have the following “engineering problems” to solve.

  1. The rubber bands slip on the rear axle. I’m considering (1) adding six small 1/4″ diameter dowels, probably 1″ long) and then looping each rubber band on one of them. However, the torque on this dowel pin might either damage the band or pop out of the axle. Another idea would be (2) six small rectangular slots in the axle, one for each band. How I’d cut these would be a puzzle (maybe with my router from each side). A 1/4″ dowel would restrict the bands from pulling back through. That would definitely work, but would the axle now be too weak.
  2. The wheels and my mounting system is a total failure. The wheels wobbed. Also the torque on the two double-thickness cardboard tabbed flange pieces caused them to rip. I think the wheels are too thin and should be made much thicker (back to the cardboard saw and the Elmers glue gallon jug). I might have to glue the wheels to the axle, but I would like to still allow them to be removed.

Older Posts »

Powered by WordPress